

Table of Contents
Automotive Repair- In the modern world, owning a vehicle comes with significant responsibility. While regular maintenance can keep your car running smoothly, unforeseen breakdowns and minor issues are inevitable. As a driver, mastering a few essential automotive repair solutions can save you time, money, and stress when facing unexpected car troubles. The following six automotive repair solutions are critical skills every driver should know to keep their vehicle in top condition and handle minor repairs on their own. Whether you’re an experienced gearhead or a beginner, these tips will help you become more self-sufficient behind the wheel.
1. Changing a Flat Tire: A Vital Skill for Every Driver

A flat tire can strike at the most inconvenient times, leaving you stranded and potentially stressed. While it’s common to rely on roadside assistance or a mechanic, changing a flat tire: a vital skill for every driver is one that can be life-saving, or at the very least, time-saving. Knowing how to change a tire with confidence is a key aspect of car ownership and personal preparedness. It’s a straightforward process, but the peace of mind it provides is invaluable.
The Importance of Being Prepared
When you experience a flat tire, it can feel like a major inconvenience. However, if you are equipped with the right tools and the knowledge to execute a tire change, the situation can be handled swiftly and safely. A driver who understands how to change a flat tire can avoid long waits for assistance or unnecessary service fees, making it an essential skill for any car owner.
A flat tire often occurs unexpectedly. Whether it’s from a puncture caused by road debris or natural wear and tear, the ability to replace it without calling for help can save you considerable time. Furthermore, knowing how to change a flat tire can help in areas where roadside assistance may not be immediately available, such as on a remote highway or during off-peak hours.
Essential Tools for the Job
To successfully change a flat tire, certain tools are necessary. These include:
- A spare tire: Always ensure your spare is in good condition and properly inflated.
- A jack: This tool lifts the car off the ground, allowing you to remove the flat tire.
- A lug wrench: To loosen and tighten the lug nuts that hold the tire in place.
- Wheel wedges: Placing them behind the tires will prevent the vehicle from rolling while the flat is being changed.
- A flashlight (if performing the task at night): Essential for proper visibility.
Having these tools on hand is crucial. If one is missing or broken, the tire-changing process could be delayed significantly, leading to unnecessary frustration.
Step-by-Step Process for Changing a Flat Tire
- Secure your vehicle: Ensure that the vehicle is parked on a flat surface, away from traffic. Engage the parking brake to prevent any movement during the process.
- Loosen the lug nuts: Before lifting the vehicle, use the lug wrench to slightly loosen the lug nuts. Do not fully remove them yet; just break their grip.
- Lift the car: Using the jack, raise the vehicle so that the flat tire is off the ground. Be sure to follow the manufacturer’s guidelines for safe jacking points.
- Remove the flat tire: Once the car is lifted, finish removing the lug nuts and take the flat tire off.
- Install the spare: Place the spare tire onto the wheel hub, aligning the holes with the bolts. Hand-tighten the lug nuts in place.
- Lower the car: Slowly lower the car back to the ground, then tighten the lug nuts fully in a crisscross pattern to ensure they are secure.
The Benefits of Mastering This Skill
Mastering the art of changing a flat tire not only gives drivers the ability to be more self-sufficient but also builds confidence in handling unexpected situations. There’s a sense of empowerment that comes with knowing you can take care of your own vehicle, especially in an emergency.
In addition, it fosters a deeper understanding of vehicle maintenance, making you more attuned to other common issues that may arise with your car. Regularly checking your spare tire, ensuring the jack is in good working order, and confirming that the lug wrench is easily accessible are all proactive measures that contribute to vehicle safety.
In conclusion, changing a flat tire: a vital skill for every driver is more than just a convenience—it’s a necessity. Mastering this skill equips you to face the unexpected with ease, ensuring that you’re always prepared to get back on the road without relying on external assistance.
2. Replacing Worn-Out Brake Pad2. Replacing Worn-Out Brake Pads: Ensuring Safety on the Road

When it comes to vehicle maintenance, replacing worn-out brake pads: ensuring safety on the road is one of the most critical tasks every driver should prioritize. Brakes are an integral part of a vehicle’s safety system, and their performance directly impacts your ability to stop efficiently, preventing accidents and ensuring smooth, controlled driving. Worn-out brake pads compromise this crucial function, making regular checks and timely replacements imperative.
The Role of Brake Pads in Vehicle Safety
Brake pads are the components that press against the brake discs to create the friction necessary for slowing or stopping the vehicle. Over time, these pads wear down due to the constant friction they endure, and when they become too thin, their efficiency decreases dramatically. This degradation can lead to longer stopping distances, reduced control, and in extreme cases, complete brake failure.
When the brake pads wear unevenly or become excessively thin, the metal components of the brake system can begin to rub against each other, leading to costly damage to the rotors and other brake components. Replacing brake pads before they wear out completely is not just a matter of preserving the brake system—it’s a matter of ensuring safety on the road.
Identifying the Signs of Worn Brake Pads
Understanding when to replace brake pads is crucial for preventing accidents and costly repairs. Common indicators of worn brake pads include:
- Squeaking or squealing noises: Brake pads are designed with wear indicators that emit a high-pitched noise when they become too thin. This sound is a clear warning sign that the pads need attention.
- Reduced braking efficiency: If you notice that it takes longer to stop or the brake pedal feels soft or spongy, it could indicate worn pads that aren’t generating enough friction.
- Vibrations during braking: A vibrating brake pedal may suggest that the pads have worn unevenly or the rotors have been damaged.
- Grinding noise: If the pads are completely worn down, the metal components may make a grinding noise, signaling that the brake system is at risk of severe damage.
The Importance of Timely Brake Pad Replacement
Delaying the replacement of worn-out brake pads can lead to severe consequences. If the pads wear down too much, the metal calipers may damage the rotors, leading to an expensive repair job. In extreme cases, failing to replace brake pads can result in complete brake failure, which can be life-threatening. It is therefore critical to adhere to a regular maintenance schedule and replace brake pads at the first sign of wear.
The Process of Replacing Brake Pads
Replacing brake pads is a moderately complex procedure, but with the right tools and knowledge, it’s something that many car owners can do themselves. Here’s an overview of the process:
- Lift the vehicle: Using a jack, raise the car off the ground and secure it with jack stands.
- Remove the wheels: Loosen the lug nuts and take off the wheels to access the brake components.
- Remove the old brake pads: Depending on the type of braking system, remove the caliper and the worn brake pads. Take note of how the pads are positioned for easy installation of the new ones.
- Install new brake pads: Slide the new brake pads into place, ensuring they are aligned correctly with the rotor.
- Reassemble the brake system: Reinstall the caliper and tighten the necessary components. Ensure everything is securely fastened.
- Test the brakes: Before driving, pump the brake pedal to ensure the new pads are seated properly and functioning correctly.
Benefits of Regular Brake Pad Maintenance
Regularly replacing worn-out brake pads not only ensures safety on the road but also extends the lifespan of other critical brake components. Properly maintained brake pads reduce the strain on rotors, ensuring smoother and quieter braking. Furthermore, replacing brake pads before they wear down too much helps prevent more costly repairs, making it an investment in the vehicle’s long-term performance.
In conclusion, replacing worn-out brake pads: ensuring safety on the road is essential for every driver. This simple yet vital maintenance task ensures that your braking system operates efficiently, protecting you and others on the road. Regular checks, timely replacements, and proper care of the brake system are keys to maintaining a safe driving experience.
3. Changing Engine Oil: Prolonging Your Vehicle’s Lifespan
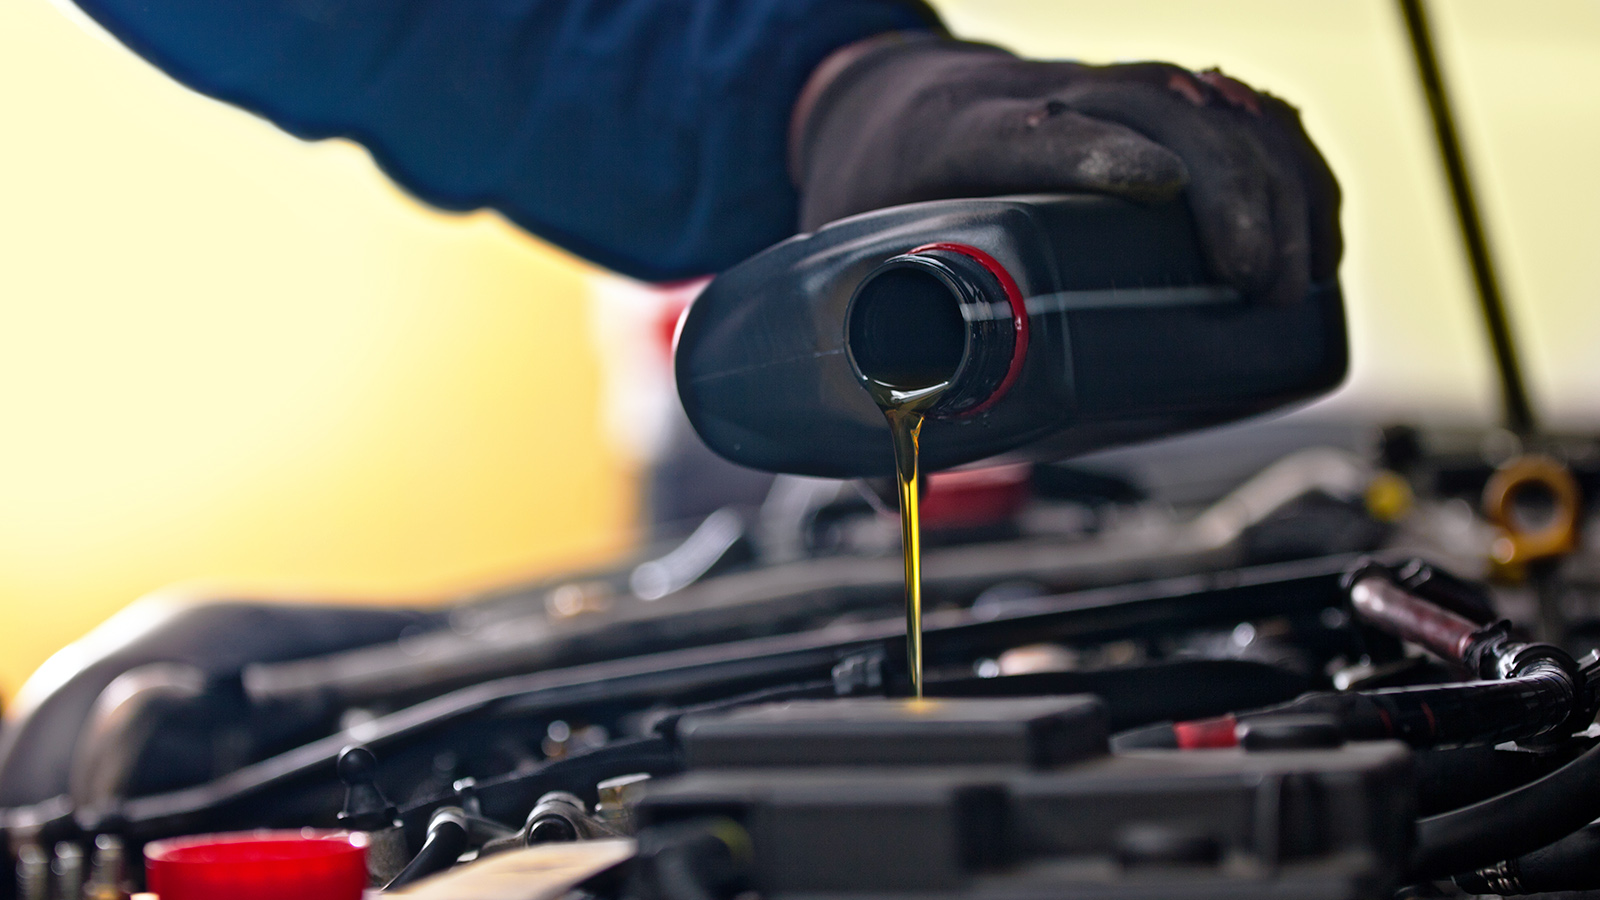
One of the most fundamental maintenance tasks every driver should perform is changing the engine oil. Engine oil lubricates the internal components of your engine, reducing friction and wear. Over time, oil degrades and loses its ability to protect the engine, leading to poor performance and potential damage.
Signs You Need an Oil Change
- The oil is dark and dirty.
- You hear engine noises that weren’t there before.
- The oil change light on your dashboard is illuminated.
Tools You’ll Need
- A wrench
- An oil filter wrench
- An oil drain pan
- New engine oil
- A new oil filter
- A funnel
Steps to Change Engine Oil
- Prepare the car: Park your car on a flat surface and let the engine cool down before beginning the oil change.
- Lift the vehicle: Use the jack to lift the car if needed and secure it with jack stands.
- Drain the old oil: Position the oil drain pan under the oil pan’s drain plug. Unscrew the plug with a wrench and let the oil drain completely.
- Replace the oil filter: Use the oil filter wrench to remove the old filter. Install the new filter by hand, making sure it’s snug but not over-tightened.
- Add the new oil: Using a funnel, pour the new oil into the engine. Check the oil level with the dipstick and add more if necessary.
- Dispose of the old oil: Take the old oil to a recycling center to dispose of it safely.
By changing your engine oil regularly, you’ll improve your vehicle’s overall performance and extend its lifespan. This simple yet effective task is one every driver can master.
4. Replacing Air Filters: Maintaining Efficient Engine Performance
A clean air filter is crucial for maintaining optimal engine performance. Air filters prevent dirt, debris, and contaminants from entering the engine, ensuring proper combustion and fuel efficiency. A clogged air filter can reduce engine performance, lower gas mileage, and increase emissions.
Signs You Need to Replace the Air Filter
- Decreased fuel efficiency.
- Rough engine idle or difficulty starting the car.
- A check engine light indicating an air intake issue.
Tools You’ll Need
- A new air filter (check the manufacturer’s specifications)
- A screwdriver or socket wrench (depending on your vehicle)
Steps to Replace the Air Filter
- Locate the air filter: In most vehicles, the air filter is housed in a rectangular or cylindrical box near the engine. Consult your owner’s manual if you’re unsure.
- Remove the cover: Use the screwdriver or socket wrench to remove the cover of the air filter box.
- Replace the filter: Remove the old air filter and insert the new one, ensuring it fits snugly and securely in place.
- Reassemble the air filter box: Once the new filter is in place, reattach the cover and tighten any screws or bolts.
- Test the engine: Start the car and listen for any irregular sounds. A new air filter should improve engine performance and fuel efficiency.
Replacing the air filter is a straightforward task that can help your vehicle run more smoothly and improve its fuel efficiency.
5. Replacing a Car Battery: Restoring Power When You Need It Most
A dead or faulty battery can leave you stranded, making it essential to know how to replace your car battery. While most drivers rely on professional help, understanding how to change a car battery yourself is a valuable skill.
Signs You Need a New Battery
- The car struggles to start or doesn’t start at all.
- The battery warning light on the dashboard is illuminated.
- You hear a clicking sound when turning the key.
Tools You’ll Need
- A new car battery
- A wrench
- Battery terminal cleaner or wire brush
- Gloves and safety goggles
Steps to Replace a Car Battery
- Turn off the car: Ensure the vehicle is off and the keys are removed.
- Remove the old battery: Use the wrench to disconnect the negative (black) terminal first, followed by the positive (red) terminal. Carefully remove the old battery.
- Clean the terminals: Use the battery terminal cleaner or wire brush to clean any corrosion from the terminals and cables.
- Install the new battery: Place the new battery in the battery tray and connect the positive (red) terminal first, followed by the negative (black) terminal.
- Test the battery: Start the vehicle to ensure the new battery is working properly.
Replacing a battery is a simple yet essential repair solution that ensures your car stays powered and ready to go when you need it.
6. Fixing a Leaky Radiator: Preventing Overheating and Engine Damage
The radiator is responsible for keeping the engine cool by circulating coolant. If your radiator develops a leak, it can cause the engine to overheat, leading to costly repairs and potential engine damage. Fixing a leaky radiator is crucial to prevent such issues from escalating.
Signs of a Leaky Radiator
- Overheating engine.
- Low coolant levels.
- Visible coolant puddles beneath the vehicle.
Tools You’ll Need
- Epoxy or radiator sealant
- Screwdrivers or socket wrench (if necessary)
- Safety gloves
Steps to Fix a Leaky Radiator
- Turn off the engine: Ensure the vehicle is off and let the engine cool before you begin working on the radiator.
- Locate the leak: Inspect the radiator for any visible cracks or holes where coolant might be leaking.
- Apply the sealant: If the leak is small, you can apply a radiator sealant or epoxy directly to the affected area. Follow the manufacturer’s instructions for the best results.
- Test the repair: Once the sealant has dried, refill the coolant and start the engine. Check for any signs of leaks.
If the leak persists or is more severe, it may require professional repair or replacement of the radiator. However, a temporary fix using sealant can prevent overheating until you can address the issue more thoroughly.
Mastering these 6 Must-Know Automotive Repair Solutions That Every Driver Should Master not only empowers you to handle common car issues on your own but also helps you save money in the long run. Whether it’s changing a tire, replacing brake pads, or fixing a leaky radiator, each of these skills is essential for every driver. By learning and practicing these repairs, you can ensure your vehicle remains in top condition and that you’re prepared for the unexpected.


